
A guide to Bullet Journaling
I’ve been using a Bullet Journal for three years now, and over that time I’ve definitely changed my style around to try and adjust to what worked and what didn’t. This page is an overview of how I set up my most recent journal for the academic year Sept ‘21 - Aug ‘22. Feel free to use any ideas or inspiration from these pages in your own journal!
What is a bullet journal?
Bullet journaling is a method of organising your calendar, task list, and planner that was developed in the 1990’s by Ryder Carroll. He shared his methodology with the world in 2013, and in 2018 published a book aptly named The Bullet Journal Method. As the method gained popularity people naturally put their own spin on the method. Nowadays there are a variety of journal styles, from beautiful calligraphic artwork on every cover page, to minimalist ballpoint pen efficiency. I found for my own uses, I need something colourful to help with the organisation, but nothing too complicated so that I can easily set up each month as I go along. So, let’s get into it.
The book

There are a wide variety of notebooks that you can choose, the standard form of bullet journal uses dotted paper. This is so you can customize the pages to suit your own needs, rather than being confined to convention of straight lines. My personal preference for bullet journalling for the last three years has been the Dingbats wildlife notebook A5+, since they are promoted as eco friendly, come in a wide variety of colours, and have thick paper with minimal bleed-through. Another common notebook that gets used is the Leuchtturm 1917, again for its high quality paper, and dotted page design. In fact these two brands of notebook are so commonly used within the BuJo community that they now both have a range of designated bullet journal notebooks. These come with some of the features of a bullet journal that you would usually set up as pre-printed designs, which can be advantages if you prefer minimal set up and just want to pick up and go. However it can also be limiting to their design, so their standard dotted notebook ranges are also an excellent choice. This is by no means an exhaustive list. You can use the BuJo method on any form of notebook, or I have even seen incorporations into using notion to keep your bullet journal. Using a virtual notebook has many advantages over a physical one, the main advantage that comes to mind is the continuous customisation and ability to move things around, so you don’t have to commit to a single set up for the entire notebook, however you do lose the practicality of having a journal you can carry around with you. Personally I find the sentimental value of having three years worth of notebooks up on the shelf incomparable having a folder on my computer that I won’t remember is there in a few years.
Set Up Guide
 The next few pages are helping to set up the bullet journal. The first page I always make sure to include a key. The key element of bullet journaling is using “bullet points” (aptly named don’t you think?) to denote different types of tasks. In my case I found the best way to keep track of these is by filling in the bullets on a completed tasks, and using different shapes for different types of tasks, such as using squares for events, and circles for jobs to do. In contrast to this, I then use designs that don’t require ‘filling in’ for things that don’t need completing. So a dash for a Note, and a star for an important event or something to remember (basically a more fancy dash). Finally if a task isn’t going to get filled in, either I haven’t completed it yet, or I no longer need to, I’ll use an arrow to indicate the task has been moved to a different list (either monthly log, or a different day), or a cross to indicate it has been canceled.
In previous years I have also included triangles or other shapes to indicate a variety of tasks, but I found that keeping it simple to these few rules is enough to get a distinction between different types of tasks, but not so many rules that I get confused or bored with them. If you are going to set up your journal, I’d recommend writing this key in pencil until you’re happy with it, so that you can adjust your style to find what works for you.
I also use this page to help with setting up the rest of the journal. When it comes to drawing out tables and sectioning pages (as you’ll see further down) it is useful to know the size of all the pages, so Along the top and left I keep a count of the number of dots along and down the pages in my journal. Then along with that I have the standard divisions into halves, thirds and quarters (to the nearest whole square) so I can just refer back to this page rather than counting them out each time.
Finally, and this is definitely something that is purely there for aesthetic, I keep track of the colors of highlighters that I use to complete my BuJo. Within the journal I use mildliner highlighters for colour, and Pigma Micron fineliner pens. I really like the look and feel of these pens, and think it gives the journal a more personal touch.
Table of Contents and Future Log
The next two pages are quite standard and minimal, this is by design so it is easy to read and give a good overview of what’s coming up in the rest of the jounral. On the left hand side I have my table of contents, detailing all of the trackers that I keep at the start of the jounral so they’re easy to reach. I find the best way to keep on top of filling in the journal is to create the monthly sections during the week before they are supposed to start, this means every event is fresh in my mind to be added into the pages, and I don’t forget to keep going. As I create each month and week page I will add it to the table of contents so I can quickly turn to the right page. Next to this I have my future log. I have found that of all the methods of bullet journaling this is the one I use the least. ASide from life-long goals such as “finish my PhD”, or “be able to handstand”, I find “the future” quite an arbitrary timeframe. As such I keep this log as a way of keeping track of long-term goals with no real deadline. However depending on how long you expect one journal to last you (I start a new notebook every september to align with the academic year) you might want to use this log for goals you expect to meet within that time frame. It’s really up to you.

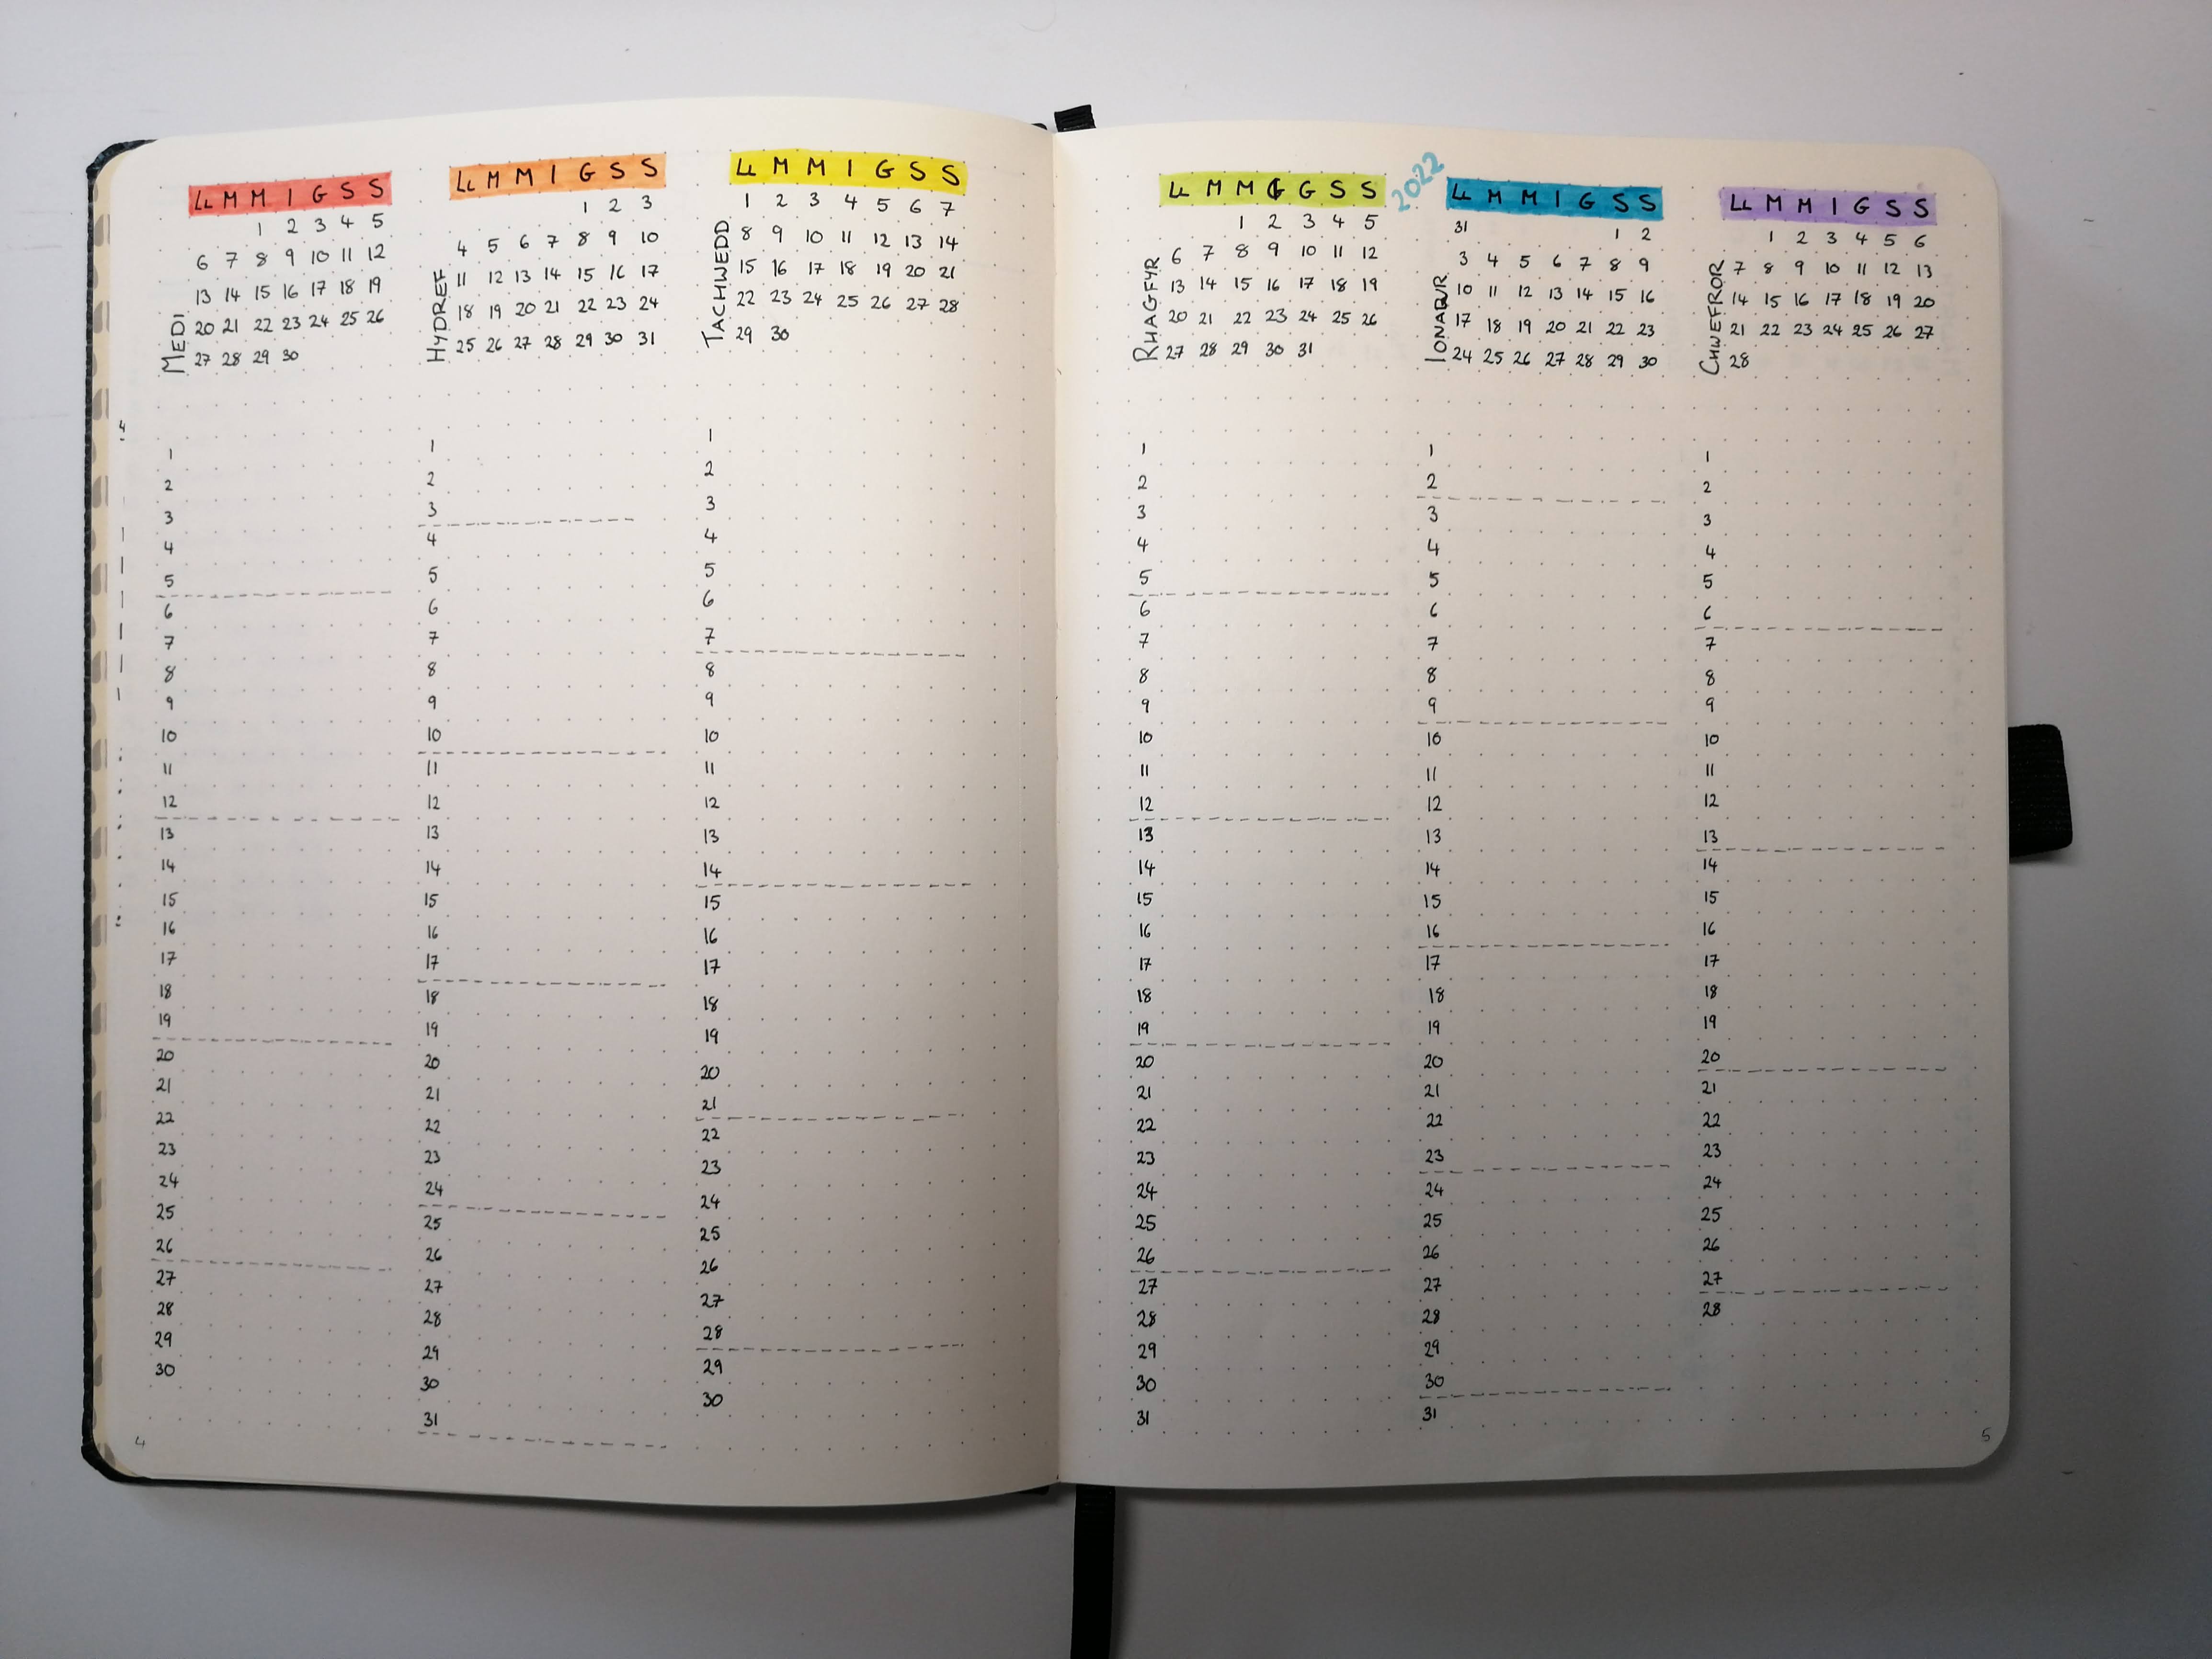
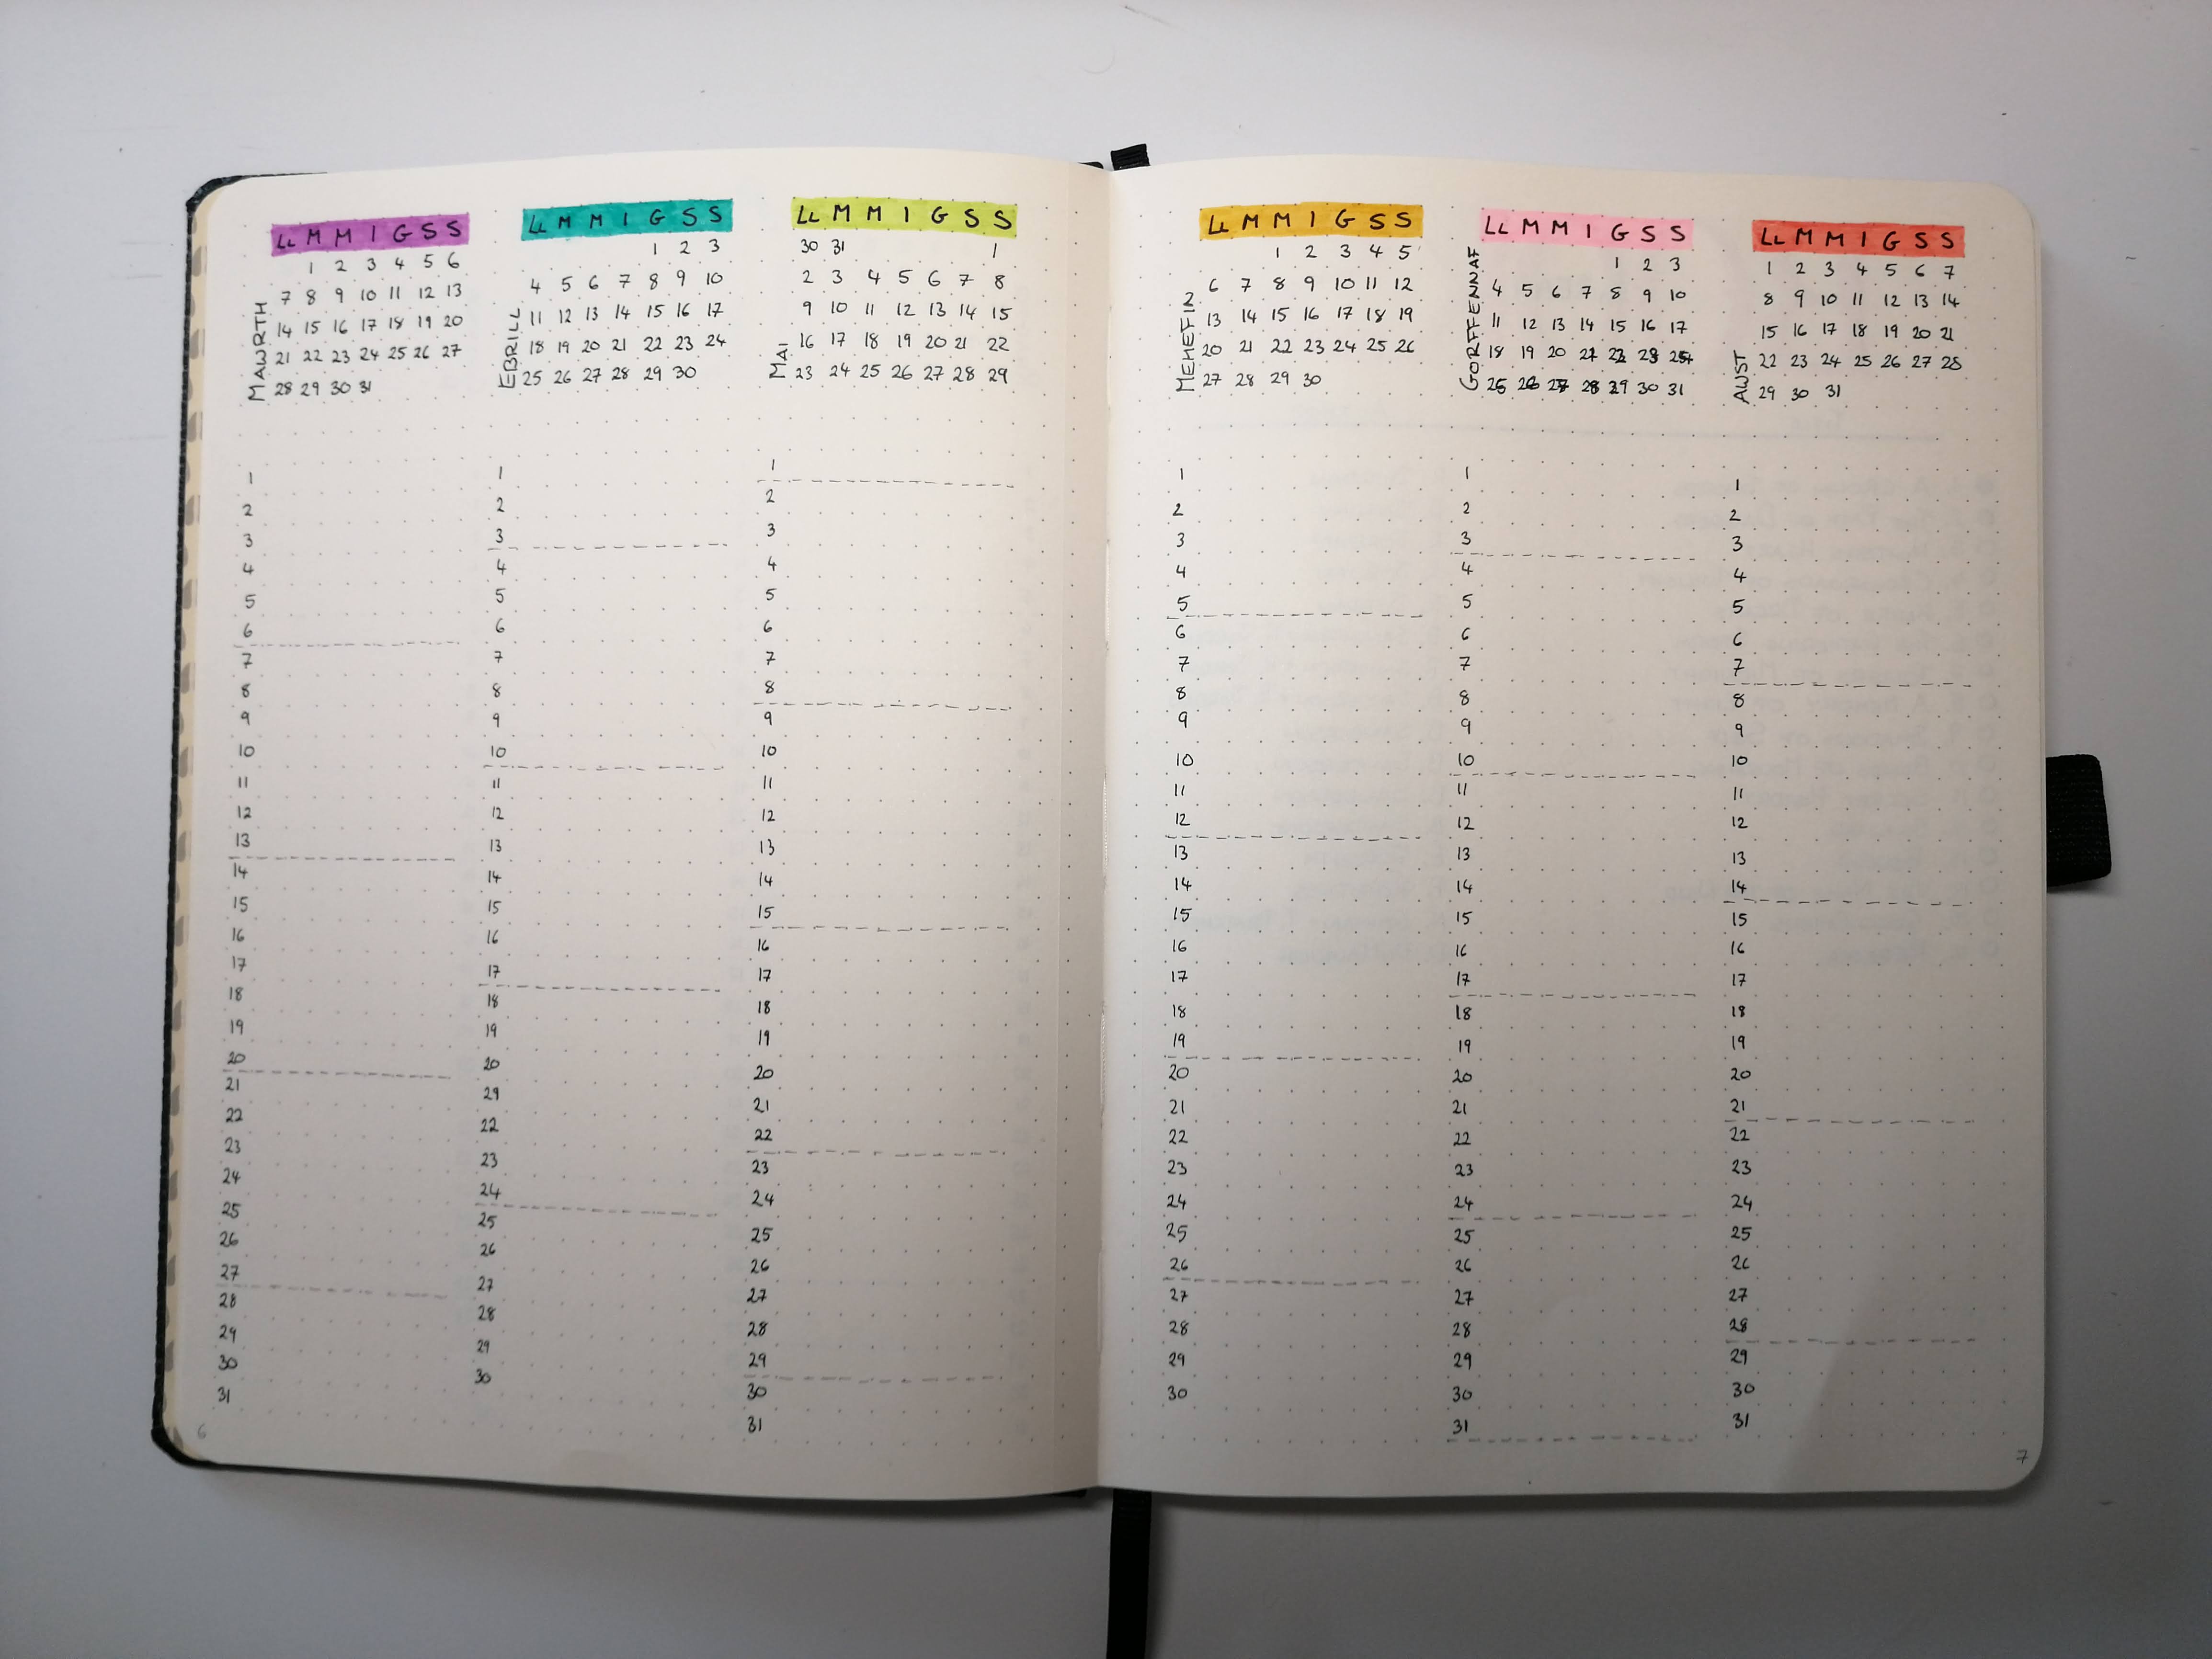
The aspect of a future log I really enjoy and find as an absolute life-saver is the year tracker, especially with my awful memory. These four pages definitely took the longest to set up but I absolutely love how they turned out. Each column is a month, starting with September 2021, going all the way through to August 2022. At the top I have a calender overview, and then going down the column is a more detailed day-by-day list of the month. I use these pages to keep track of fixed events, such as family birthdays, anniversaries or holidays. Each of these types of events are then colour coded, and I will colour in the number in the column but also at the top of the column in the calendar. This way I have a quick visual guide indicating if there are any upcoming birthdays or dates I should remember, but also a description of what is actually happening in detail further down. Finally, (and definitely the least useful but thing that really makes the pages pretty imho) is the dashed lines. These simply correspond with the end of each week, again so I have a very quick visual indication of where the columns correspond with the calendars. I found without these lines added in, it’s too much information in one big block.
Trackers
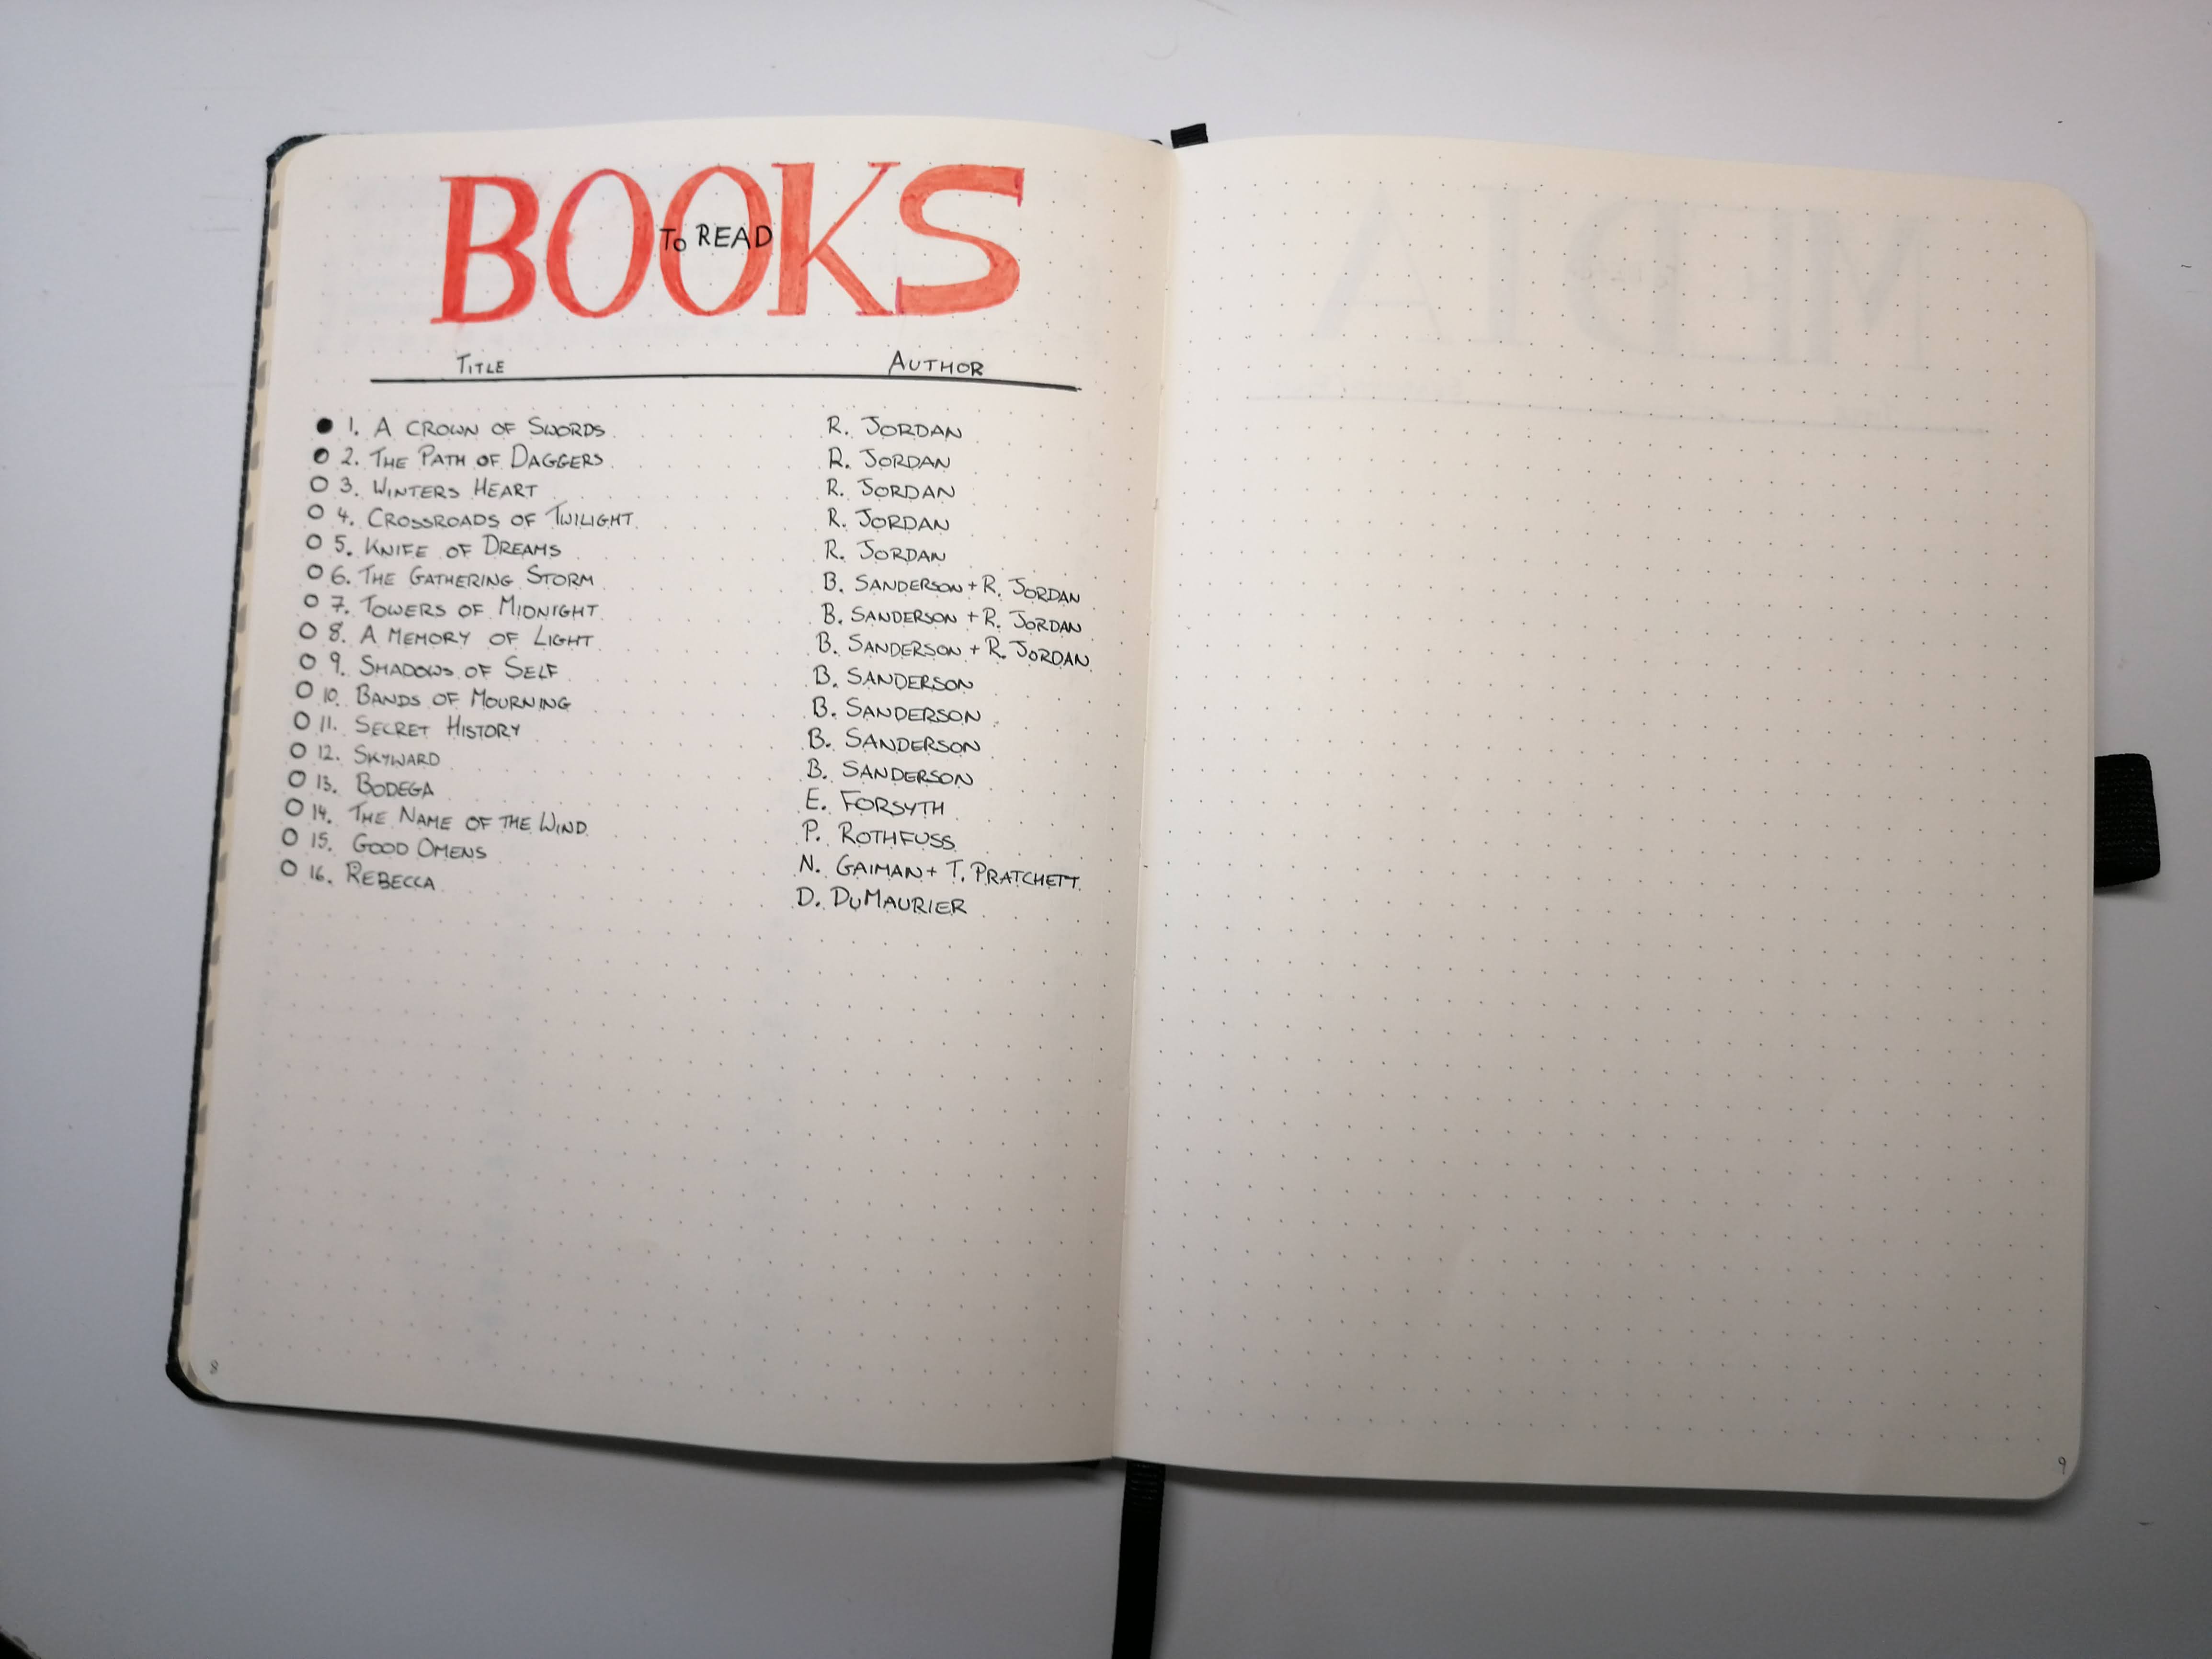
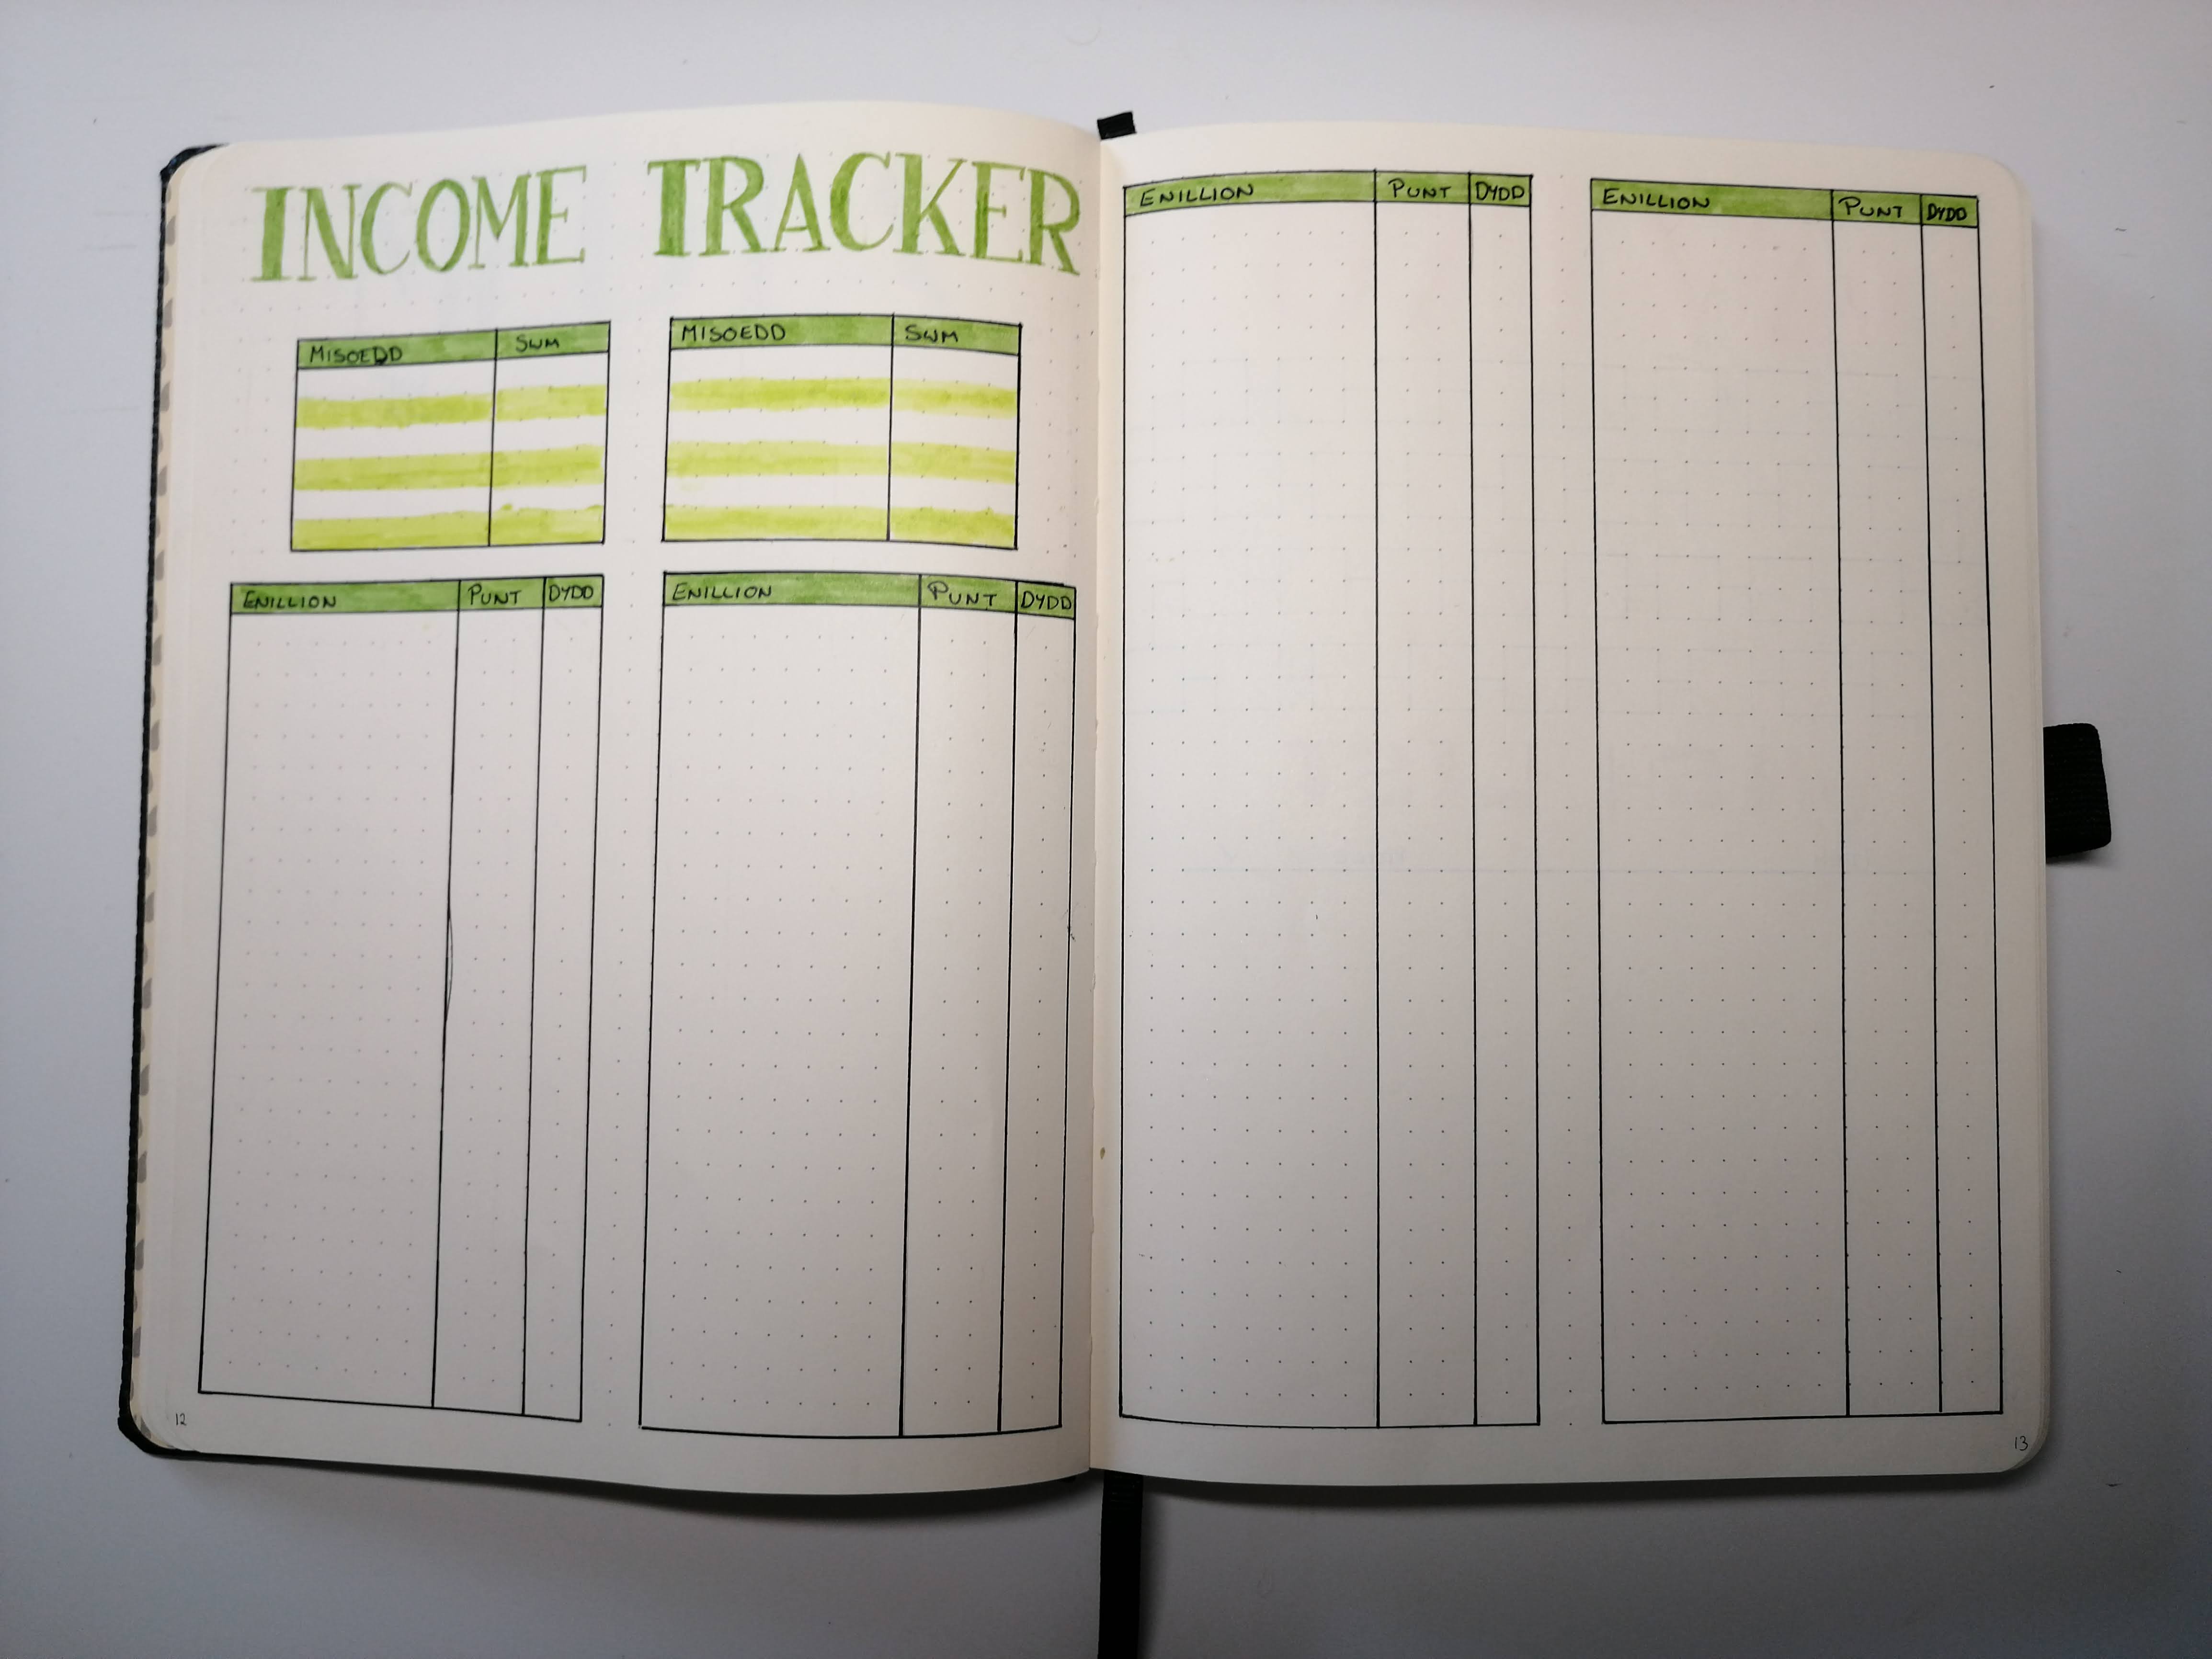
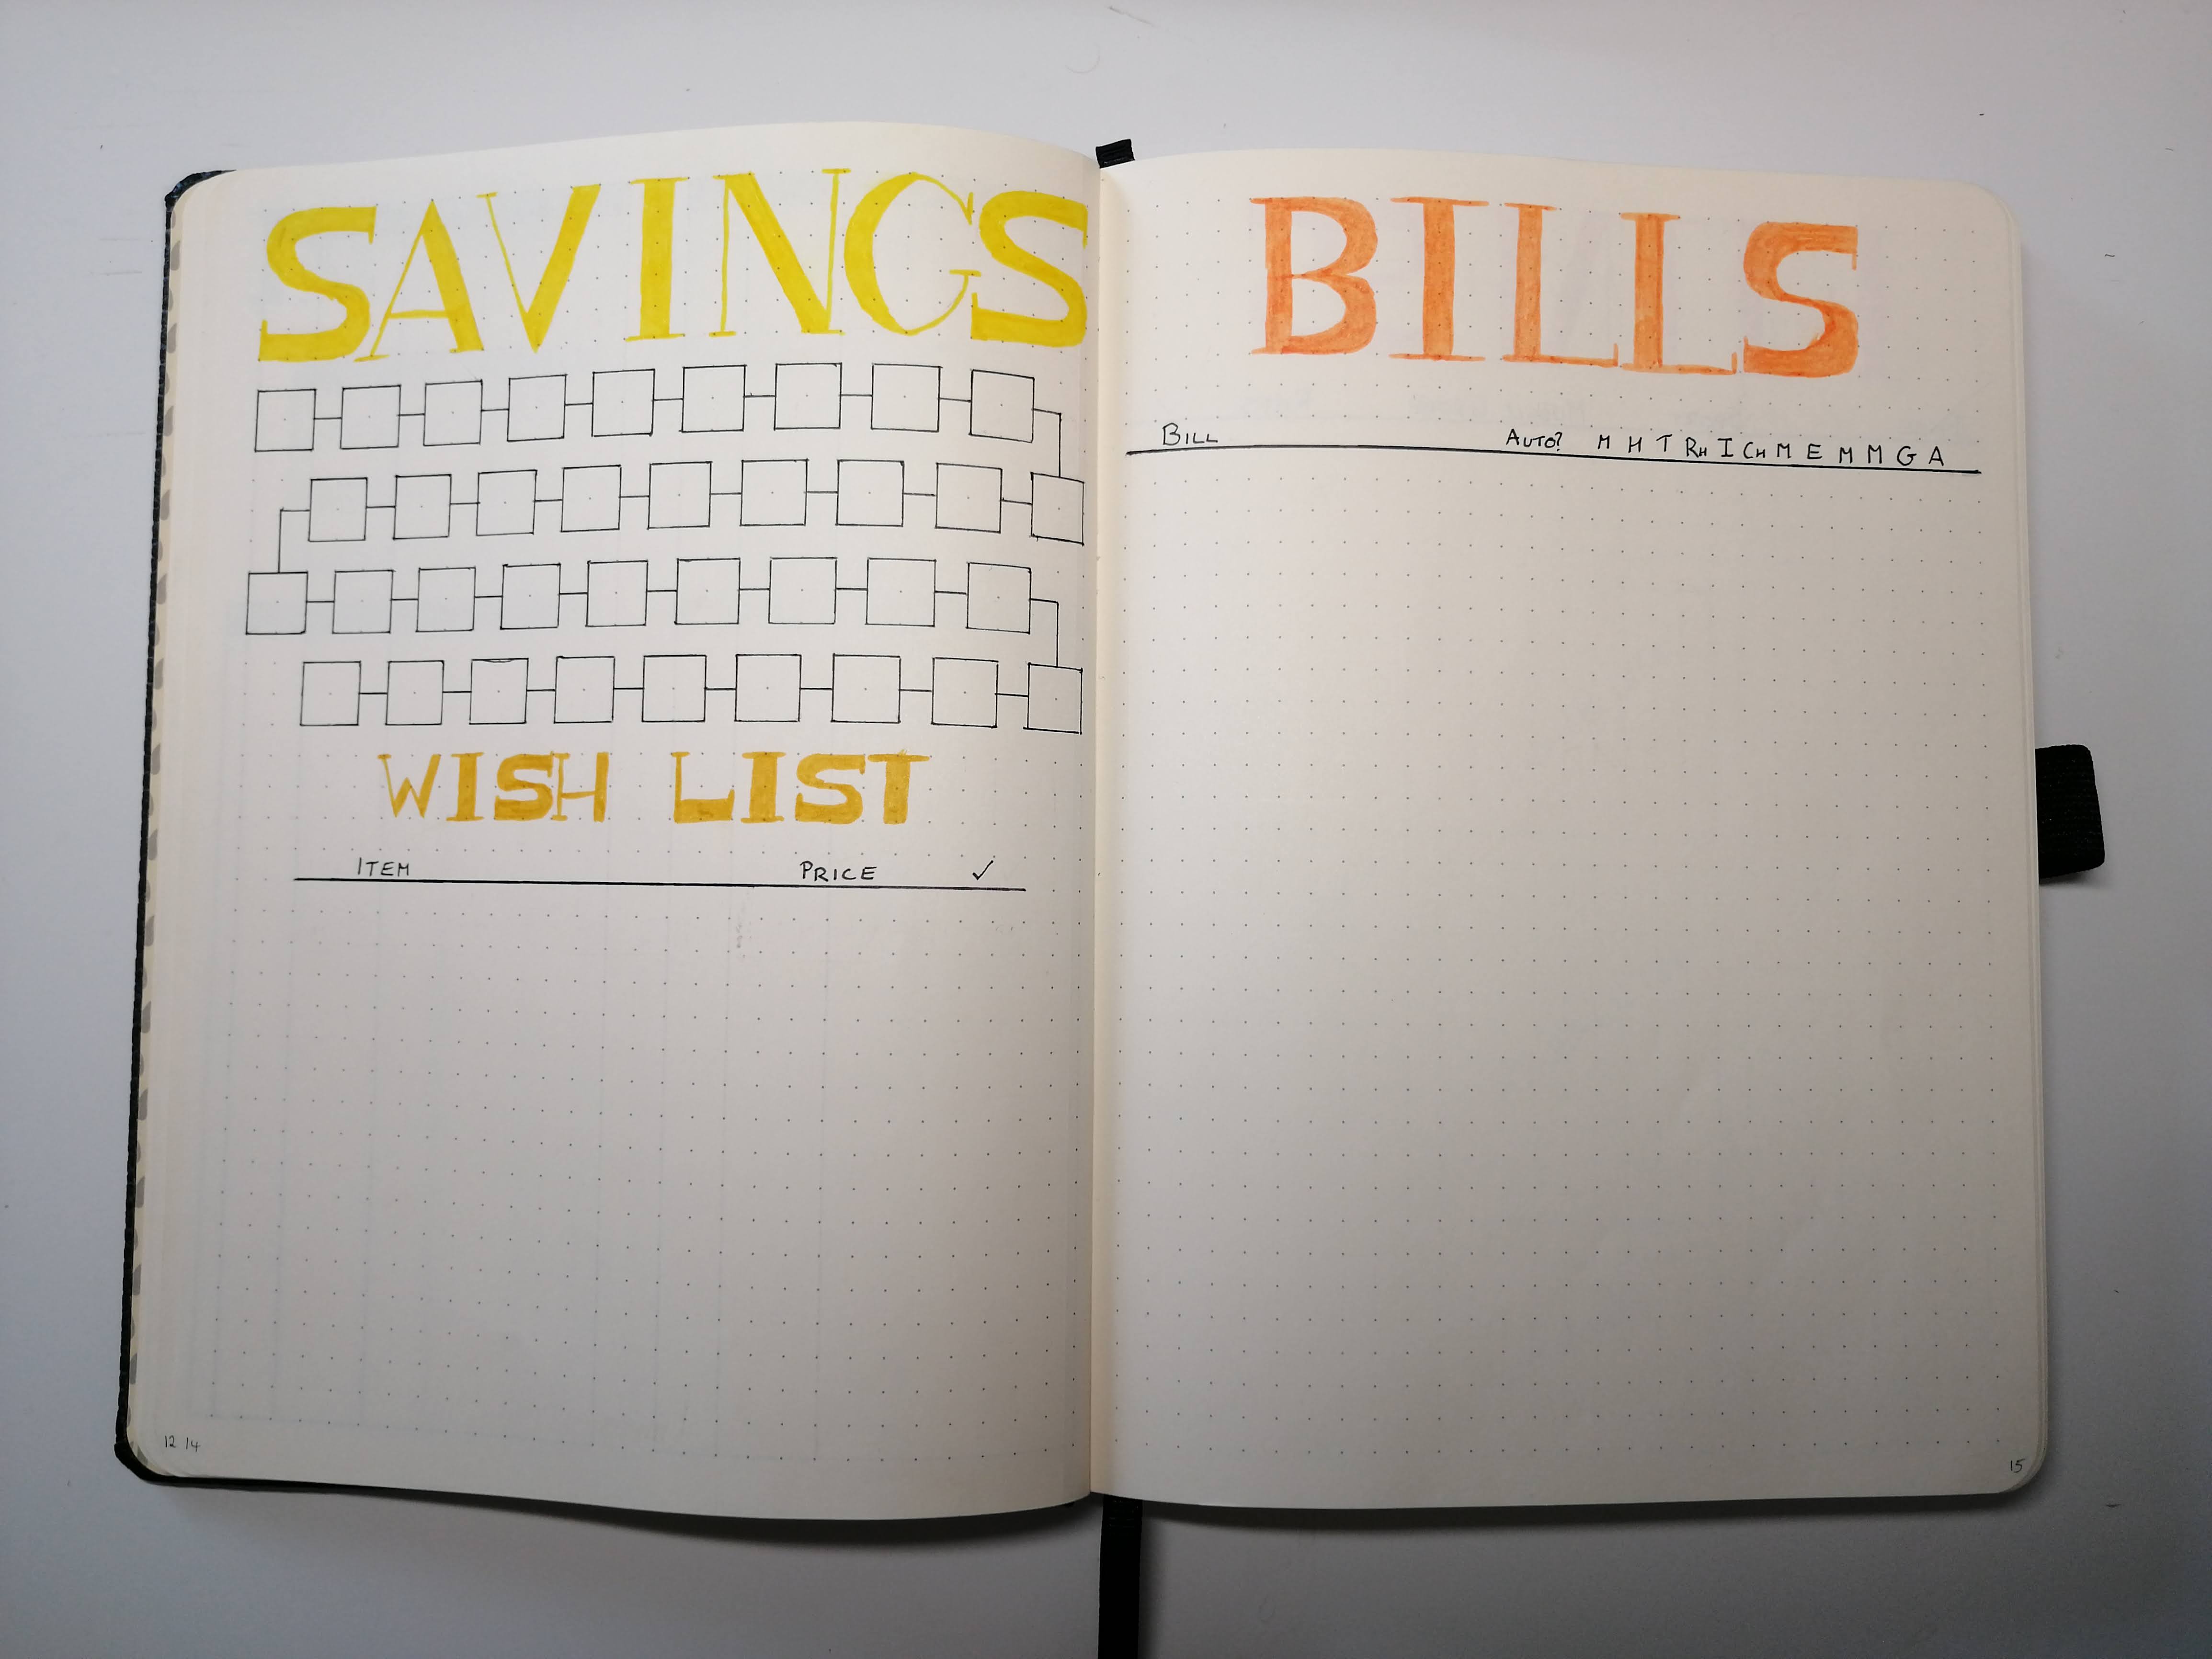
The next block of pages are definitely optional, and not part of the standard bullet journal. However, they are definitely the most fun and something I find incredibly useful. These are all of my trackers. I use these pages to record progress, write ideas and keep an eye on my general mood. Depending on what sort of log, and how detailed it needs to be changed the style of the page, but after setting them up they’re low effort enough to keep up with filling them in.
Monthly Log
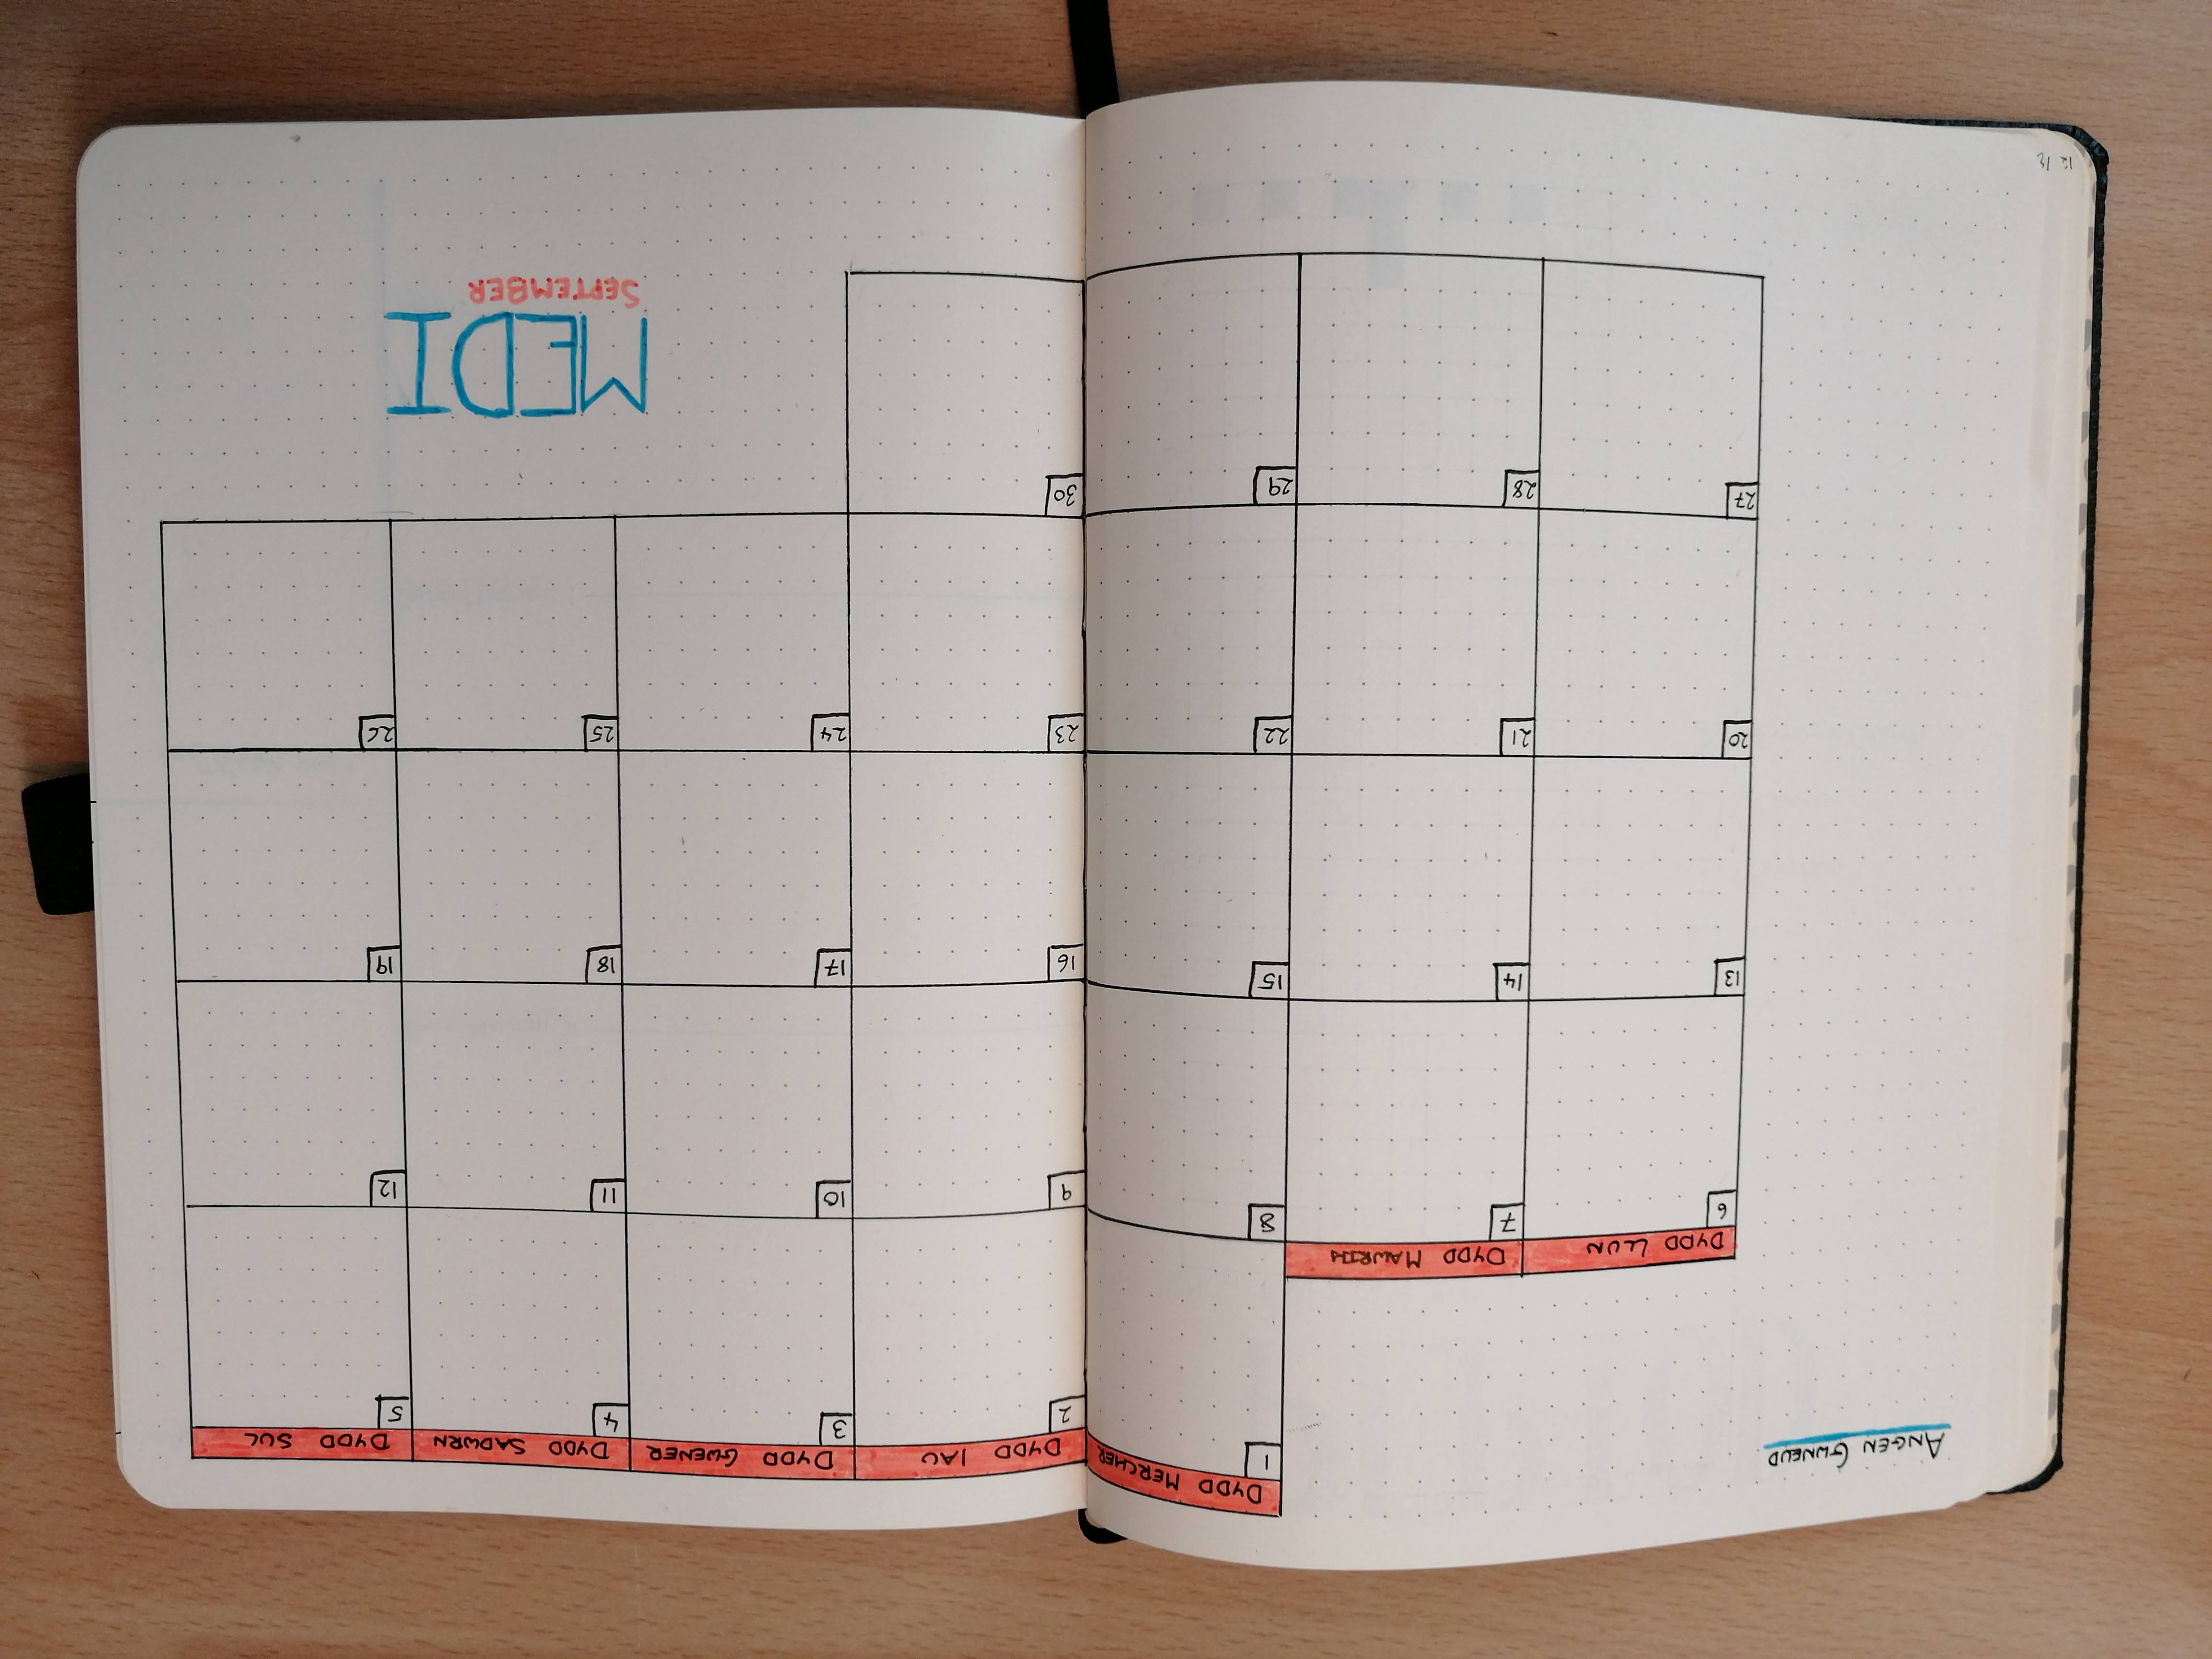
At the start of each month I include a month calendar, with a matching job list for the larger jobs that I want to get done at some point in the month, but aren’t tied to a specific date. Lik ebig cleaning jobs or upcoming birthdays I need to get cards for. I’ll also include dates, social events or important meetings in the month calendar here, that weren’t planned long enough in advance or aren’t permanent enough to go in the year tracker.
Weekly Log
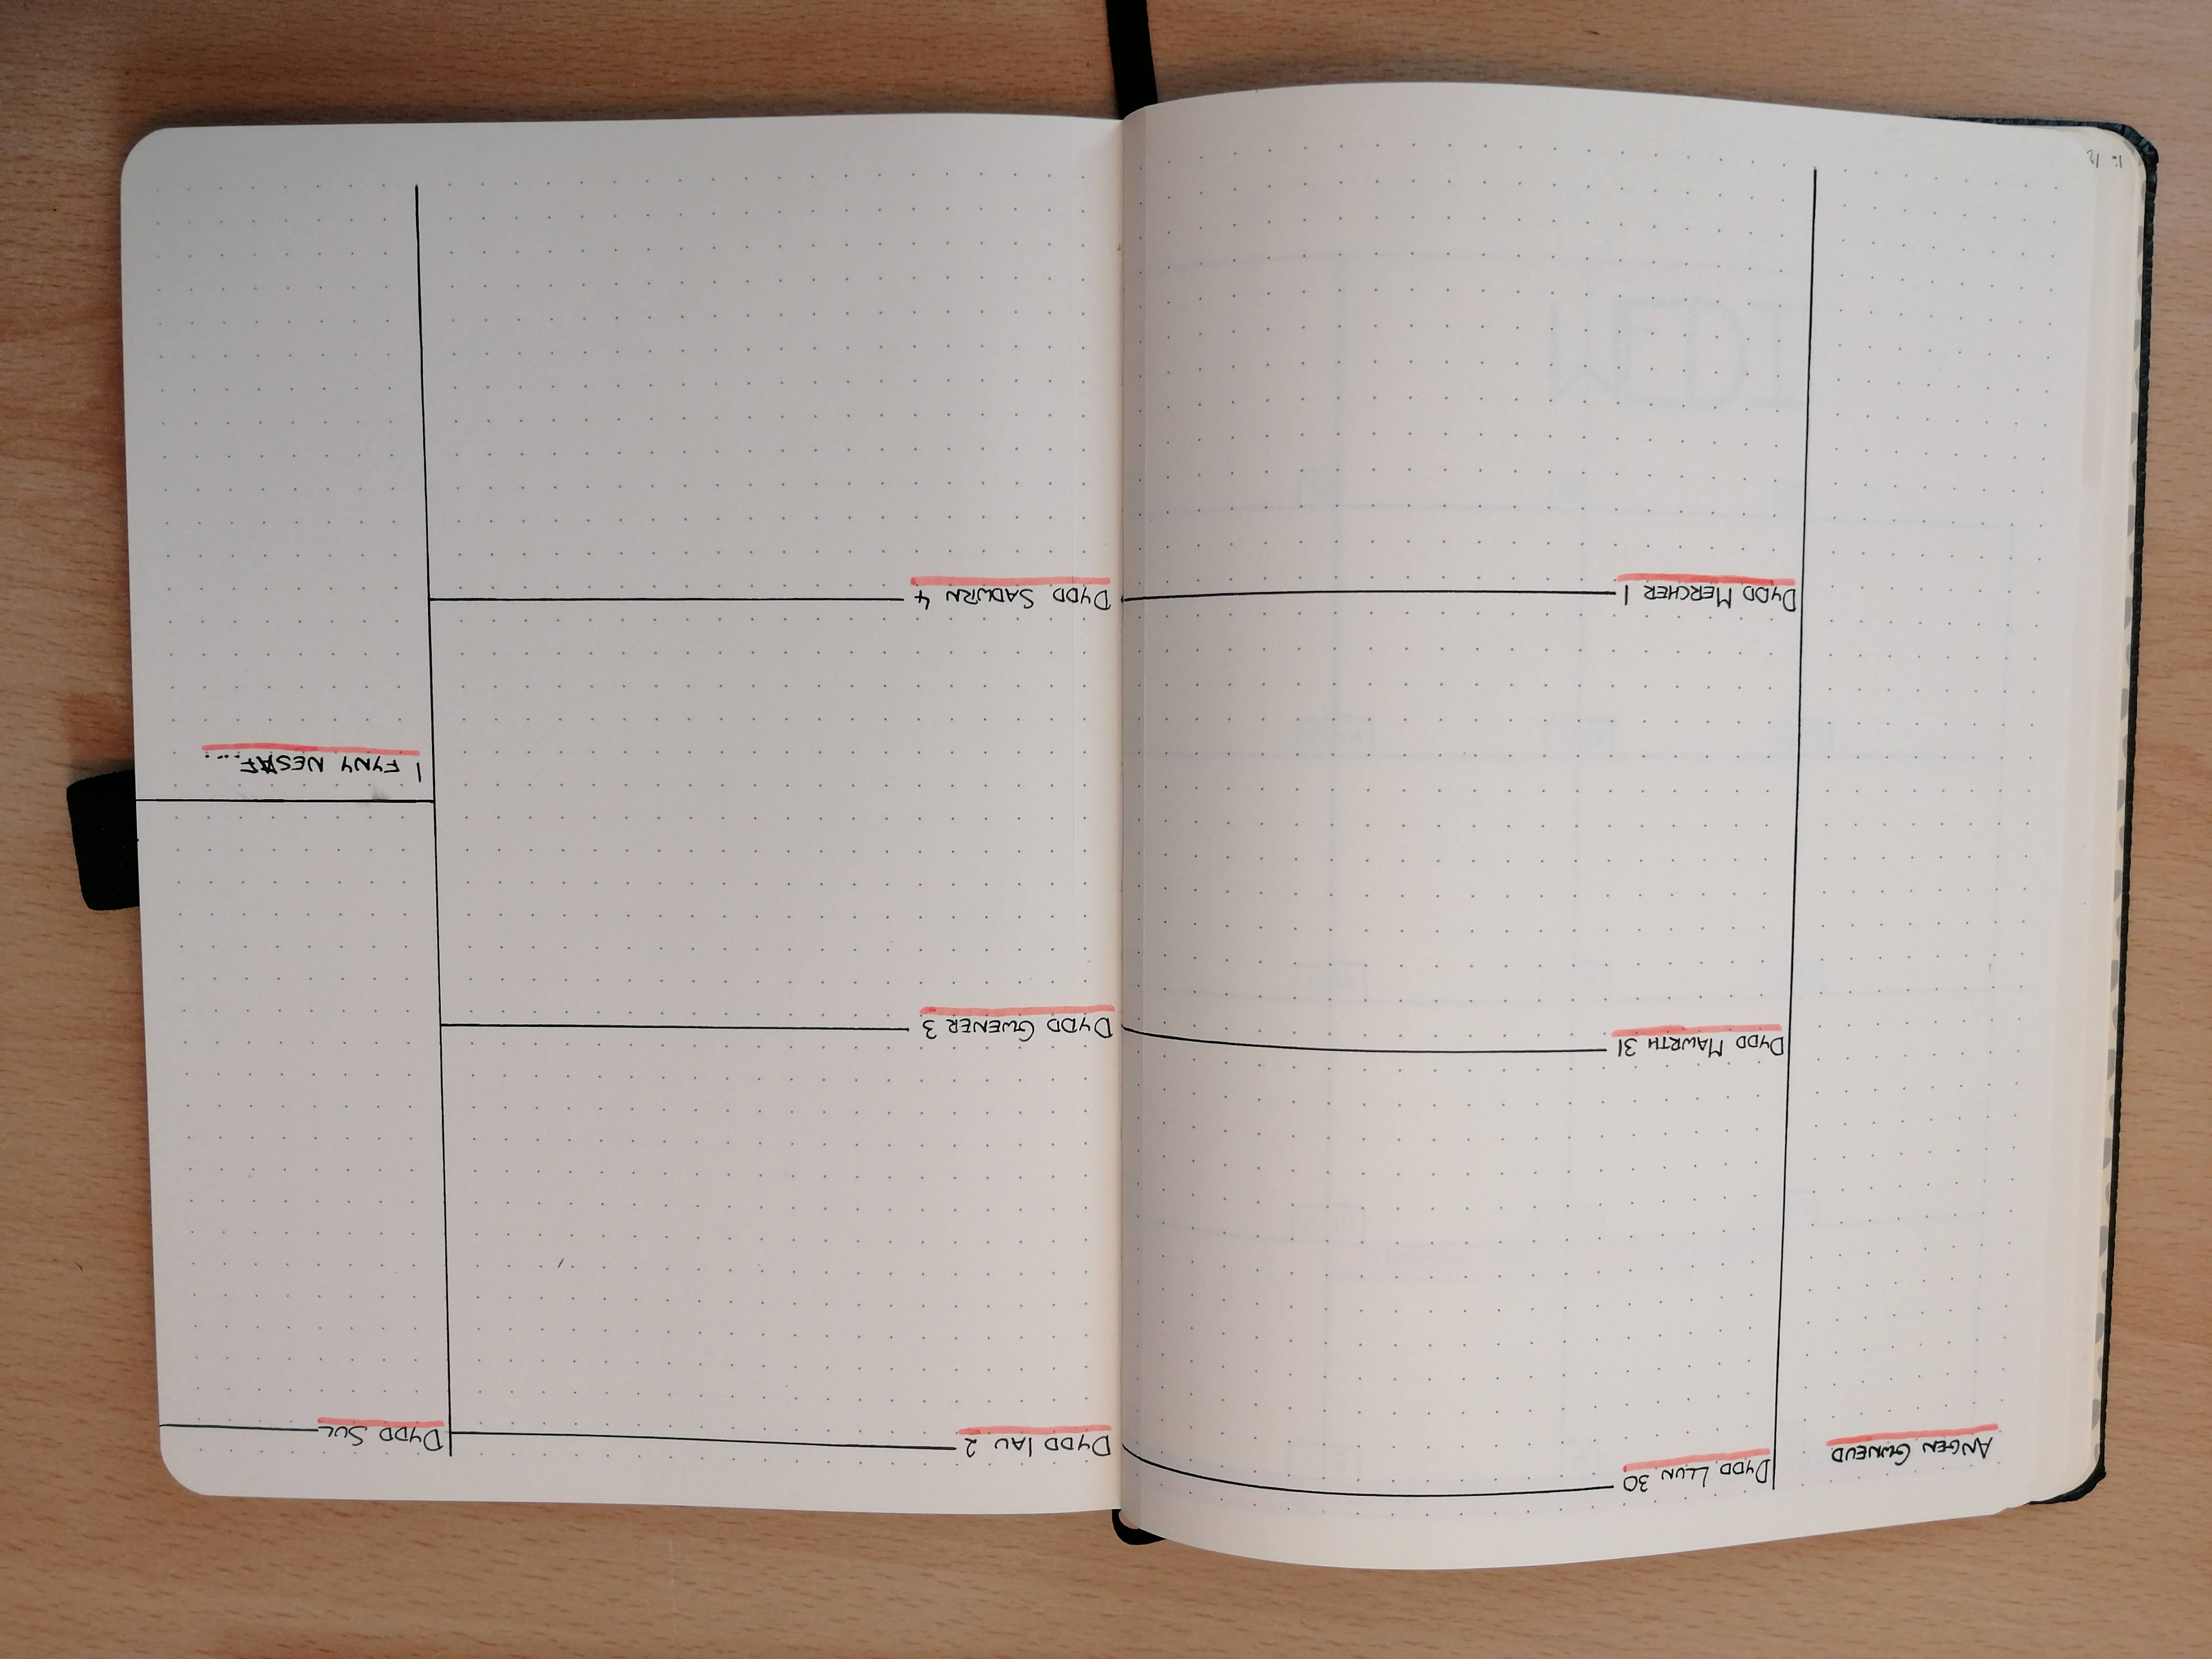
I like keeping each week as minimal as possible to make it easy to keep using. At the start of the week I will put all my recurring meetings in the schedule, and add any tasks that have been brought across to the to do list. These pages are definitely the messiest but that’s because they get the most use. Once tasks have been completed or they need to be moved I will use the key in the guide to change things.
Hope that helps!